
Let’s create our album artworks. All the artworks should be exported in JPG / 300 DPI / RGB / 16 bit color / No Bleed format. Please do not make your artwork in pdf, tiff, png or any other formats. Please do not export your artwork in low resolution. 300 DPI makes it look beautiful. Please do not encode your file in any other resolution. Do not place text near the edges.
You can use any software to create your album artworks.
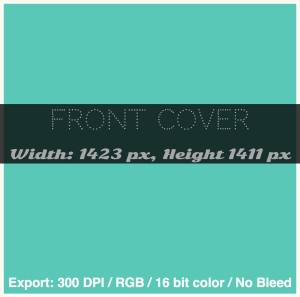
STEP 1: Design Your Front Cover
The album cover should be in these sizes:
Width: 1423 px, Height 1411 px
After designing your artworks please export it in this format:
300 DPI / RGB / 16 bit color / No Bleed / JPG
Give your cover this name: Front-Cover.jpg
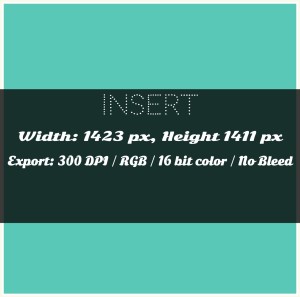
STEP 2 : Design Your Insert
Insert is the artwork which is behind your Front Cover art. Follow the same actions:
Width: 1423 px, Height 1411 px
After designing your artworks please export it in this format: 300 DPI / RGB / 16 bit color / No Bleed / JPG
Give your artwork this name: Insert.jpg
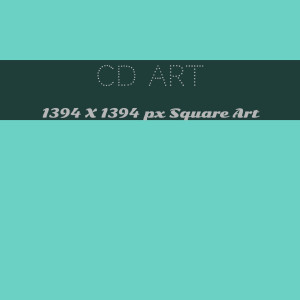
STEP 3 : Design Your CD Art
Your CD Art should be a square artwork. Our machines will create a circle on the CD automatically. You shouldn’t make or mark the circle. Also there shouldn’t be any writings in the centre of the artwork.
Please export it in this format: 300 DPI / RGB / 16 bit color / No Bleed / JPG
Please give your file this name: CD-Art.jpg
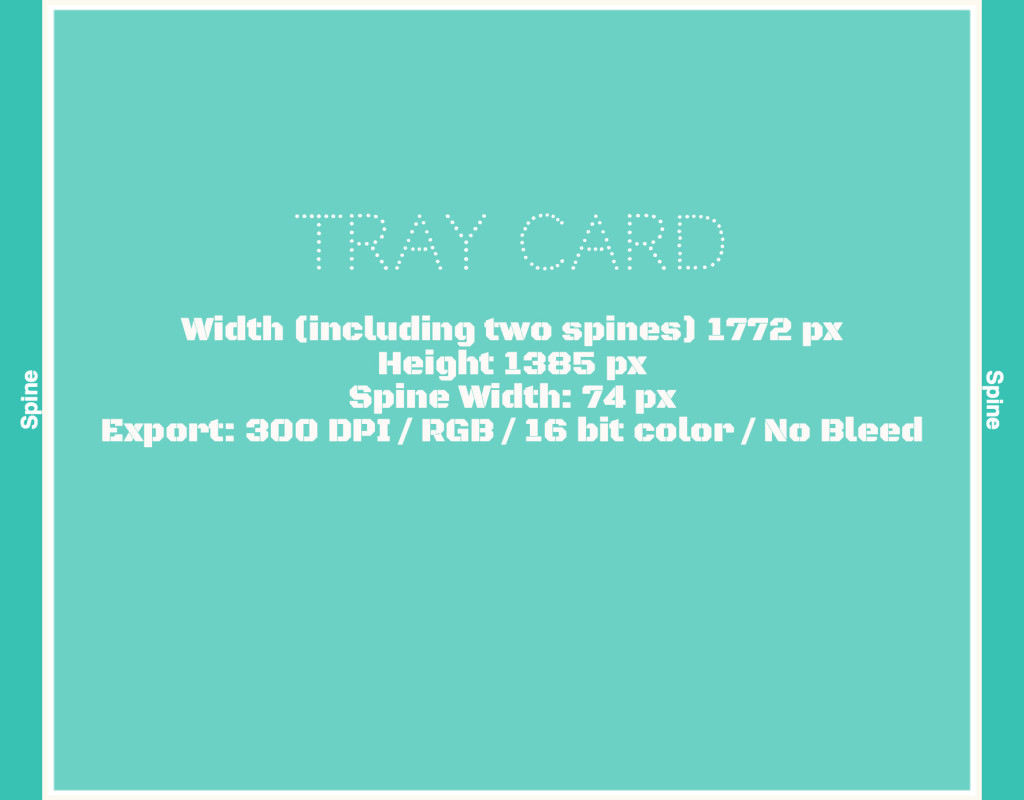
STEP 4 : Design Your Traycard
Please design your artwork in this format.
Width (including two spines) 1772 px
Height 1385 px
Spine Width: 74 px
After finishing the design export it in this format: 300 DPI / RGB / 16 bit color / No Bleed
Give your artwork this name: Tray-Card.jpg
That’s all!
Quick Links:
Artglider CD Producer – Easy and cost-effective solution for CD production and order fulfillment.